Astrogation is the major form of long-distance travel within the Saturn system, both interlunar and within the rings. There are two types of astrogation: interlunar and in-ring astrogation. Interlunar will happen between Enceladus Prime and the rings, and has it's own unique set of astrogation denominations. In-Ring relies more so upon the pilot's capabilities, as it is a dense debris field and most ships do not have an autonomous autopilot.
In-Ring Astrogation
In-ring astrogation is a reliable form of travelling long distances without requiring too much active flying from the pilot, as well as being considerably more remass-efficient. It effectively allows time to be skipped to travel long distances, and unlike entering the rings deeper than the shallows, doesn't cost anything except remass, however it does require that the astrogator is aware of a target at that location.
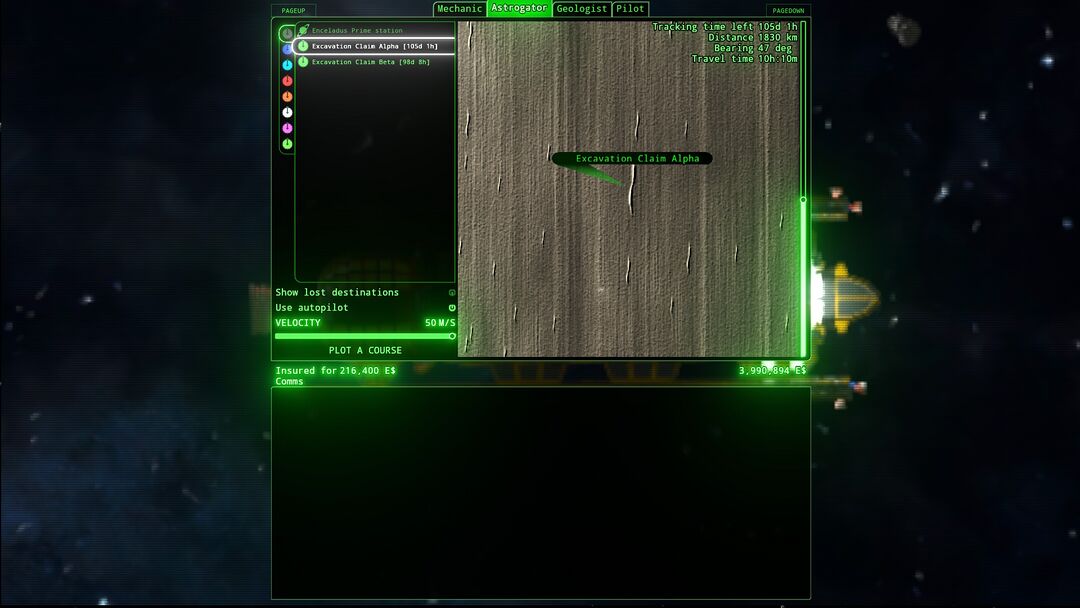
The menu itself provides a lot of information towards astrogation, as well as a decent few options that the menu itself provides.
- Ring Map - Taking up the majority of the menu, a map of the rings is providing a view of the area centered on the targeted dive area. It can be zoomed to better show nearby or far-out surroundings. Astrogation points will visually show their locations along here also.
- Astrogation Target List - Shows a list of currently active astrogation targets and how long they have remaining until the object becomes 'lost' (excluding Enceladus Prime, which has no timer and can be performed anywhere, and B8 Claim Beacons, which will just return to Enceladus Prime when the timer runs out).
- Target Icons - To the left of each astrogation target is an icon that displays what type of target it is. Each target (with the exception of Enceladus Prime) can have it's color changed to one of 8 colors total. Most targets show a signal-strength-esque icon, claim beacons, rendevous drop points, & other targets that don't require astrogator tracking use a timer icon, while any empherical drop point (ones that disapear once you visit it), such as big lidar contacts & radar anomalies use a radio tower icon. Each icon shows a visual strength, which slowly dissipates once the timer is below 7 days, with a cross shown above lost targets.
- Show Lost Destinations - Enabling this shows a list of non-empheral targets that haven't been visited in the astrogator's current tracking time. You are still able to travel to the last known position of them, however they will have drifted since. Objects will drift further the longer they remain lost.
- Use Autopilot - Whether to (if disabled with manual controls) enable the autopilot, and automatically set the correct velocity and angular vectors. It's advisable to disable this when carrying any precarious equipment, as it can cause sudden movements and fling it free. You can perform the same task that this setting does at any point by pressing the stop key,
Xby default. - Velocity - The velocity at which the ship is set to astrogate at. This value can range from between 10 m/s, all the way to a tuneable maximum of 100 m/s (190 m/s on the Bald Eagle's custom firmware), with a default tuning of 50 m/s. Going at 10 m/s can be useful with precarious equipment, as it does allow you to be at an almost standstill to calculate astrogation. The time spent astrogating also scales with the changing of this, so that should be taken into account for time-dependent tasks.
- Plot a Course - This button starts astrogation to the selected target with your given settings. You can always cancel this by opening OMS with
Jby default.
- Astrogation Info - This section on the top right when selecting any target except Enceladus Prime shows information about astrogating to that target.
- Tracking Time Left - This part is pretty self explanatory, it's the time left that you can track the object before it is "lost", identical to the value next to the item's name
- Distance - The distance to the selected target from your current location
- Bearing - The angle to the selected target from your current location.
- Travel Time - The time it would take to travel to the selected target given your current speed settings.
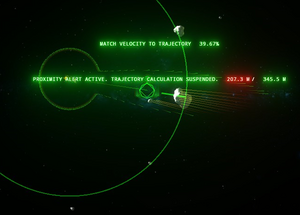
You will need to be careful with in-ring astrogation, as objects inside the perimeter will stop the calculations, however this can be mitigated through several means.
- Moving out of their way - moving out of the way does work well, however if you drift too far it will rewind some of the calculations
- Using a LIDAR to not see the objects - because the perimeter (and by extension, autopilot) cannot see the rings the way you do, it has to use the LIDAR (or RADAR) to see objects, so if you use either the Beamformed LIDAR or a slowed-down LIDAR/RADAR, you can effectively "not see" the rocks and still astrogate in a dense field
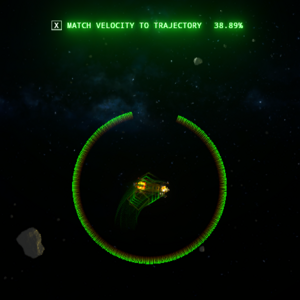
The "Stop Ship" autopilot control setting [X by default] will return the ship's velocity vector to the bearing and velocity needed, however does not return the orientation to match the bearing.
Interlunar Transit
Interlunar transit is the main way to travel to and from the rings, and is performed in different ways depending on which side of Saturn you are on.
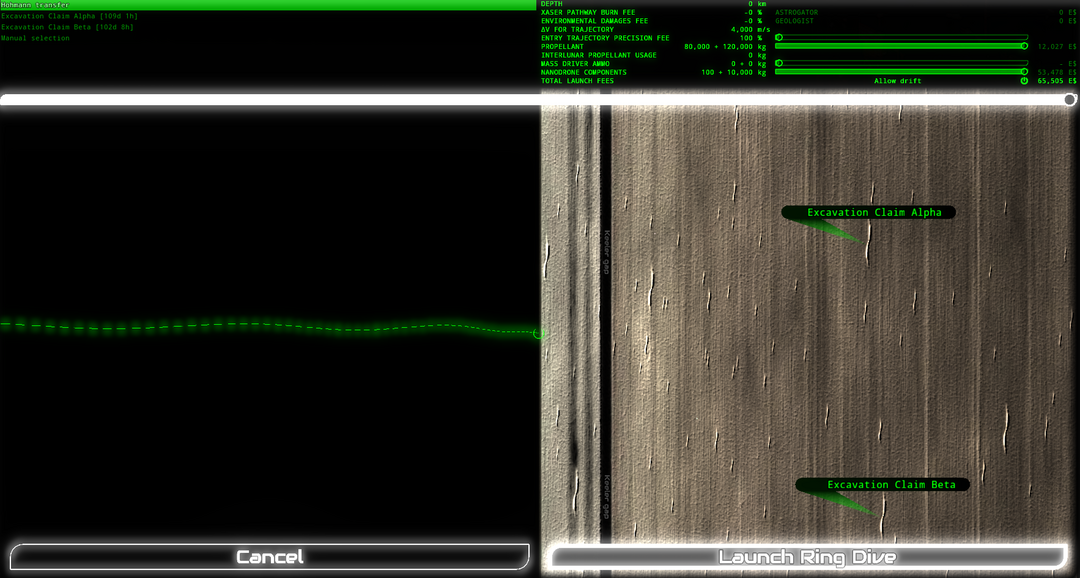
The Launch Ring Dive menu provides the most comprehensive setup for astrogation out of any form of it. The menu itself contains most of the parameters useful for performing transit to the rings, being where you also resupply on consumables as well, while providing a few extra options for transit that aren't available for astrogation within the rings. It is split into 3 separate sections.
Transit Target
The top-left panel on the dive screen shows a list of active astrogation targets, as well two settings for using a Hohmann Transfer or a manual selection target within the rings. A Hohmann Transfer will make the most remass-efficient transfer to the edge of the rings, selecting another astrogation target will bring you close to the selected point with the settings provided in other sections, and a transfer to anywhere else is registered under the manual transfer.
Dive Info and Consumable Refills
The top-right panel provides info about the currently selected dive and allows you to fine-tune how you arrive within the rings and with how much in the way of consumables.
- Depth - the depth meter shows what specific depth you will be astrogating too. This number is the big determining factor for incurred astrogation fees, however going to the edge (depth 0) is always free of fees. Will not let you dive past 2 700 km, however a lower precision can get you slightly further.
- XASER Pathway Burn Fee & Environmental Damages Fee - are two fees that will be incurred by diving beyond the rim. These costs can be reduced with an astrogator and geologist respectively, and scale with their level for a reduction of up to 98%. Both their percentages and the total fees are displayed.
- ΔV for Trajectory - The total ΔV needed to be spent to reach the current dive target in time. Will always have a minimum ΔV of 4 000, and scales with a further distance from the Hohmann Transfer point, up to a ΔV of 9 400.
- Entry Trajectory Precision Fee - An additional fee multiplier that allows your selected dive to be much more precise, up to 2 000% greater. The multiplier directly multiplies the XASER Pathway Burn Fee, however given that the needed XASER burn is narrower, the Environmental damages fee is inversely proportional - i.e. a fee of 1 200 E$ for XASER and 200 E$ for environmental at 100% precision costs 24 000 E$ for XASER burn and 10 E$ for environmental.
- Propellant - How much you want to refill your remass tanks by. Automatically is set to completely fill but can be toned down if you use an MPU or are planning a quick dive and want to run lighter. Remass kept from previous dives are automatically stored before more remass can be put in.
- NOTE! - Starting a dive with a completely empty tank immediately starts the SAR cutscene, even making you unable to get remass via MPUs.
- Interlunar Propellant Usage - how much propellant is needed to complete the currently selected dive.
- Mass Driver Ammo & Nanodrone Components - Sliders dedicated to choosing how much you want to restock mass driver ammo and nanodrone components. Consumables kept from previous dives are automatically stored before new consumables can be put in.
- Total Launch Fees & Allow Drift - The allow drift button takes into account the rotation of Saturn. Disabling this will keep your selected position static, but may induce a greater remass cost due to the continued rotation of the rings. The total fees incurred to start the current dive is displayed next to this toggle.
Ring Map
The large bottom panel shows a map of the rings. Here you are able to see a large portion of the ring, along with any visible astrogation POIs, and any ship flares appearing. You can select any point along the map to dive to, up to a depth of 2 700 km. A zoom slider is also provided to allow for more precise changes in position.
Returning to Enceladus Prime
This protocol thins the line between interlunar and in-ring astrogation, as technically performs interlunar astrogation, however given it's performed within the rings and still abides by most of the rules of in-ring astrogation.
This protocol will always appear at the top of the astrogation list, and unlike other in-ring astrogation, only the proximity detection circle is used, without the directional needle. Due to the fact that interlunar transit speeds are required (4 000 m/s), the velocity slider is also disabled for this process.


